| |
|
1 |
Check Uni
Student Email Account -- This is where you will send today's lessons
to yourself |
2 |
Today we will create
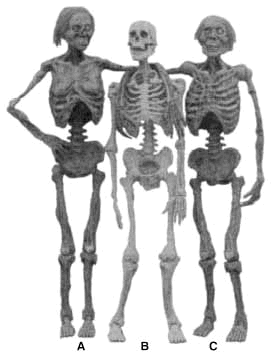
a new version of Louise Taylor's Skeleton page.
|
|
Have a look at it |
|
 |
If you cannot move the elements around then you must
be in Netscape . This effect works only in Internet Explorer. Not
to worry it will work. |
|
|
|
|
3 |
|
4 |
- Open up FrontPage. create a new page save it as dragging.htm inside
a New Folder called DraggingPages inside the My Documents folder.
- Click on the HTML tab at the bottom of the page
- Open up Louise's Skeleton page.
- In the view Menu select Page Source
- Notice the Heading Tags and what is contained between them.
- This time around we have a new comer
- <style>
<!--
.drag{position:relative;cursor:hand}
-->
</style>
- copy this code and paste it just below the title tag in your FrontPage
document
- The style command is setting up the use of the command drag.
|
5 |
Then comes our JavaScript
<script language="JavaScript1.2">
<!--
var dragapproved=false
var z,x,y
function move(){
if (event.button==1&&dragapproved){
z.style.pixelLeft=temp1+event.clientX-x
z.style.pixelTop=temp2+event.clientY-y
return false
}
}
function drags()
{
if (!document.all)
return
if (event.srcElement.className=="drag"){
dragapproved=true
z=event.srcElement
temp1=z.style.pixelLeft
temp2=z.style.pixelTop
x=event.clientX
y=event.clientY
document.onmousemove=move
}
}
document.onmousedown=drags
document.onmouseup=new Function("dragapproved=false")
//-->
</script>
Copy this code just below the Script tags,
this sets up the mouse as a device for moving |
6 |
Now comes the hard part where we have to have
the images ready. This part goes in the body tag
<p align="center">
<img src="../images/pelvis.gif" width="93" height="66" class="drag">
<img src="../images/lowerleg.gif" width="37" height="134" class="drag">
<img src="../images/foot.gif" width="59" height="71" class="drag" class="drag">
<img src="../images/lowspine.gif" width="92" height="138" class="drag">
<img src="../images/skel10shoulder.gif" width="83" height="102" class="drag">
<img src="../images/upperleg.gif" width="41" height="117" class="drag">
<img src="../images/lowerleg2.gif" width="33" height="122"class="drag">
<img src="../images/skel11skull.gif" width="73" height="101" class="drag">
<img src="../images/ribs.gif" width="97" height="100" class="drag">
<img src="../images/arm.gif" width="44" height="134" class="drag">
<img src="../images/arm.gif" width="42" height="131" class="drag">
<img src="../images/upperarm2.gif" width="22" height="135" class="drag">
<img src="../images/upperarm.gif" width="24" height="128" class="drag">
<img src="../images/upperleg2.gif" width="42" height="131"
class="drag">
<img src="../images/foot2.gif" width="61" height="74"class="drag">
</p>
Notice the addresses for the images, to make it work you will need to
replace those addresses with you own addresses and with your own images.
|
7 |
The last part consists of the Button that displys
a small window where we can check our finished product against some preset
form.
<form>
<p align="center"><input type="button"
value="Check if your skeleton is correct ?"
onclick="window.open('see.htm', 'Sample', 'toolbar=no,location=no,directories=no,status=no,menubar=no,scrollbars=no,resizable=no,copyhistory=no,width=200,height=600')"></p>
</form>
Value is the name of the button.
The window open command looks for the file see.htm, you will have to
create this. Notice the long list of no commands, these are used to set
the shape of the window being opened. Note especially the size.
This will need to be adapted for the window you wish to open. |
8 |
Now the Hard Part coming up with the images
, the background even , so that you create an interactive page .
Use Paint Shop Pro, or even Paint to create the effect you need.
|

